Cyanobacteria in a reef tank: what causes it and how to get rid of it for good
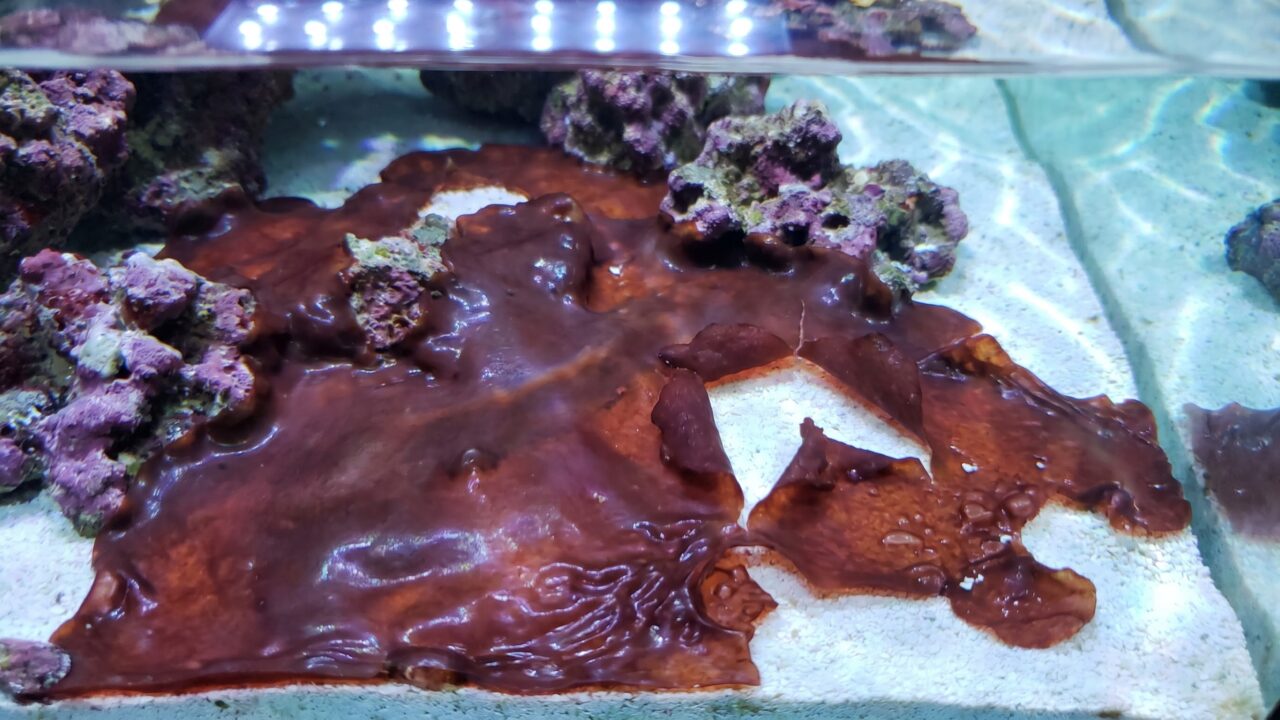
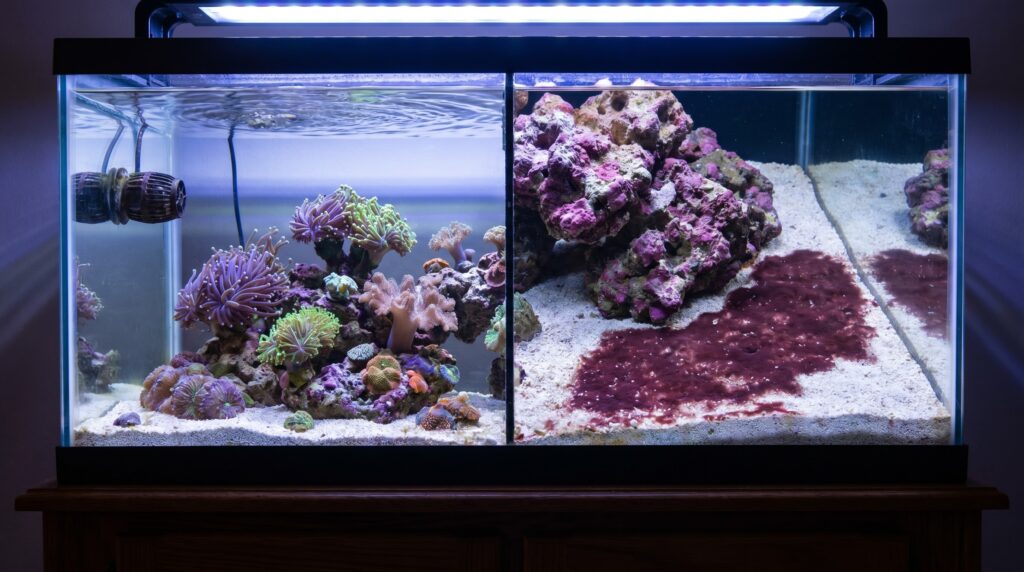
That dark red slime spreading across your sandbed or up the base of a rock is not algae. Most reefers call it red slime, and the name sticks, but calling it algae sends you chasing the wrong fix. Cyanobacteria are bacteria, and that distinction matters a great deal for how you treat them.
Cyanobacteria are among the oldest living things on the planet - photosynthetic prokaryotes that appeared roughly 3.5 billion years ago, long before true algae existed. They carry a red pigment called phycoerythrin alongside the familiar blue phycocyanin and green chlorophyll-a, which is why colonies in reef tanks typically look maroon, rust-red, or dark purple rather than green. The same pigment chemistry explains why they can persist under spectral conditions that normal algae cannot.
The short version: cyanobacteria blooms almost always come from a combination of excess dissolved organics, low water movement over a surface, and an imbalanced nutrient ratio. Fix those three things in order and most outbreaks clear within two to three weeks without chemicals.
Why cyanobacteria grow in reef tanks specifically
Several conditions make the modern reef tank an almost ideal habitat for cyanobacteria. Understanding them is more useful than any single treatment.
Elevated nutrients - especially the phosphate-to-nitrate ratio
High phosphate and nitrate together create the classic bloom setup. ATI North America lists excess phosphate, nitrate, and poor water movement as the three primary drivers, recommending phosphate stay between 0.02 and 0.05 ppm and nitrate between 0.025 and 5 ppm. Seachem's guidance aligns: their target range for reef phosphate is 0.02-0.05 mg/L. Both extremes matter - nutrients that run too high feed cyano directly, while nitrate that drops to zero can trigger a different kind of outbreak (more on that below).
There is a subtler trap, though. Some species of cyanobacteria can fix dissolved nitrogen directly from the water column - the same trick that makes them so ecologically powerful in the open ocean. When phosphate climbs but nitrate stays low (a common result of aggressive carbon dosing or heavy macroalgae export that strips nitrate while feeding keeps phosphate elevated), nitrogen-fixing strains gain a competitive edge over normal algae that cannot tap atmospheric nitrogen. Research published in PMC's environmental microbiology literature confirms that these diazotrophic strains are "strongly favoured" when phosphorus is in excess relative to nitrogen, and that they release 40-80% of their fixed nitrogen back into the water, effectively fueling their own continued bloom. This is why a tank that tests zero nitrate can still run heavy cyano.
Chasing zero nutrients is counterproductive. Target the ranges above, not zero. If you have been dosing carbon aggressively or running heavy macroalgae that has stripped nitrate to nothing while phosphate remains detectable, that imbalance is a warning sign worth acting on before the slime appears. For a deeper look at the tools for dropping phosphate safely, see our guide to lowering phosphate in a reef tank.
Low or stagnant flow
Cyanobacteria form mats precisely because they can colonize surfaces in near-still water. A thin biofilm anchors to sand or rock, intercepts nutrients, and expands outward in sheets. Where flow is vigorous and chaotic, that biofilm cannot establish. Dead zones - the back corners of a sump, the underside of an overhanging frag rack, the shadow behind a rock - are where every outbreak starts.
Modern wavemakers like the EcoTech VorTech are engineered explicitly for "tank-wide flow patterns" with no "hot spots" that would blast corals while leaving pockets stagnant. The principle applies regardless of brand: you want water reaching every surface in the tank, not just the middle water column. Our article on wavemakers and powerheads walks through placement strategies for eliminating those dead zones.
Degraded or incorrect lighting
This cause surprises many reefers who assume their light is either on or off. T5 fluorescent bulbs degrade spectrally as they age - not just in total output, but in which wavelengths they emit. ATI North America states directly that "an algae and/or cyanobacteria bloom can also be an indication that the bulb's light spectrums are deteriorating and need replacement" in an otherwise stable tank. Their replacement guideline is 9-12 months for bulbs running an 8-12 hour photoperiod, and new bulbs typically produce roughly twice the PAR of old ones.
LED fixtures do not degrade the same way, but running an excessively long photoperiod - especially with a heavy blue spectrum - can favor photosynthetic nuisance organisms including cyanobacteria. If your light is over 12 months old and T5-based, replacing it is worth doing before any other intervention. If it is LED, tighten your photoperiod to 8-10 hours.
Poor nutrient export and overloaded filtration
An undersized or neglected protein skimmer fails to pull dissolved organics before they fuel bacterial growth. Old or exhausted GFO media stops adsorbing phosphate. A refugium macroalgae crop that has not been harvested for weeks is consuming nitrate but no longer pulling phosphate, which recreates the same nutrient imbalance described above. Any of these individually can tip the balance toward a cyanobacteria outbreak, and they often occur together in a tank that has been running well for a year or two without a maintenance audit.
Cause checklist before you treat
Work through this list before reaching for any product. Treating without diagnosing just delays the next outbreak.
| Check | What to look for | Target / action |
|---|---|---|
| Phosphate | Test with a reliable meter (Hanna checker) | 0.02-0.05 ppm; above 0.05 ppm needs active export |
| Nitrate | Test and compare to phosphate level | 0.025-5 ppm; if nitrate is zero but phosphate is detectable, that ratio is a trigger |
| Flow dead zones | Hold a thin strip of paper near the sand; watch it stay still | Every surface should show visible water movement |
| Skimmer performance | Is it pulling dark, wet skimmate daily? | If skimmate is pale and watery, clean neck and adjust |
| Lighting age (T5) | Check bulb install date | Replace if older than 12 months; change 1-2 bulbs per week to avoid coral shock |
| Photoperiod (LED or T5) | Total hours lights are on | Trim to 8-10 hours if running longer |
| GFO media | When was it last replaced? | Replace every 4-6 weeks or when phosphate creeps up |
| RODI water TDS | Test your top-off and water-change source | Must read 0 TDS; silicate and phosphate in tap water seed outbreaks |
| Feeding load | Is uneaten food reaching the sand? | Feed only what fish consume in 2-3 minutes; remove excess immediately |
| Refugium harvest | Is macroalgae actively growing and being trimmed? | Harvest a portion weekly; stagnant macroalgae stops exporting nutrients |
Staged treatment ladder
These steps are ordered deliberately. Start at Step 1 and move to the next only when you have completed the previous one and given it time to work. Jumping straight to chemicals without fixing the root cause produces a two-week relief followed by an identical outbreak.
| Step | Action | Duration / notes |
|---|---|---|
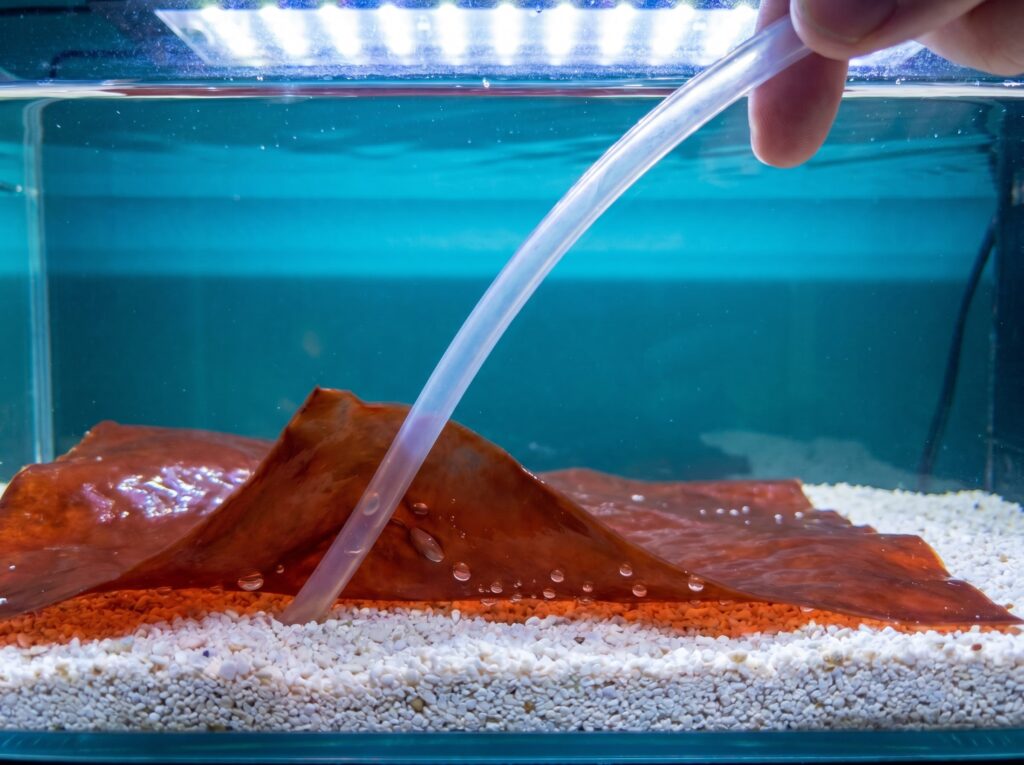
| 1 - Manual siphon | Gently vacuum off all visible mats with airline tubing or a thin gravel siphon. Try to lift sheets intact rather than shredding them (dispersed fragments re-seed). Siphon into a bucket through a filter sock to recover the water if needed. | Do this before every other step; repeat as mats return while you address root causes |
| 2 - Fix root cause(s) | Using the checklist above: adjust flow to eliminate dead zones, repair or clean the skimmer, replace exhausted GFO, reduce photoperiod, audit RODI quality, reduce feeding. Address every flagged item simultaneously. | Ongoing; allow 2-3 weeks to see measurable improvement |
| 3 - Small frequent water changes | Change 10-15% every 3-5 days using 0 TDS RODI water and a quality salt mix. This dilutes dissolved organics and corrects nutrient ratios faster than a single large change. | Continue for 3-4 weeks alongside Step 2 |
| 4 - Blackout (optional, use with caution) | A 3-day total blackout starves cyanobacteria of their photosynthetic energy. Block all ambient light. Boost surface agitation with an airstone. Pause alkalinity and calcium dosing. Important: SPS corals can bleach during a 72-hour blackout; this step is safer on FOWLR or soft-coral-dominated tanks. Do not use as the only intervention - the blackout does not remove the nutrient load that triggered the bloom. | 72 hours maximum; follow with a water change and gradual light ramp-up over 48 hours |
| 5 - Chemical treatment (last resort) | Products like Boyd ChemiClean work by oxidizing trapped organic sludge rather than by antibiotic action (ChemiClean does not contain erythromycin). Dose: one level scoop per 10 gallons dissolved in tank water. Turn off protein skimmer, UV sterilizer, and remove carbon/GFO. Run a large airstone throughout - mandatory, as the oxidation reaction depletes dissolved oxygen. After 48 hours, perform a 20% water change and restart filtration media. Do not use unless Steps 1-3 are in place; chemicals alone will not prevent recurrence. | 48-hour treatment cycle; repeat once if needed; do not use in tanks with heavy invertebrate load without close monitoring |
A note on the blackout and chemicals: both are temporary suppressants. The research is consistent on this point - cyanobacteria blooms are driven by physical conditions (nutrients, flow, light spectrum), and any outbreak that clears without fixing those conditions will return within weeks. The ladder works because it forces you to address the environment, not just the visible slime.
How to tell cyanobacteria apart from other nuisances
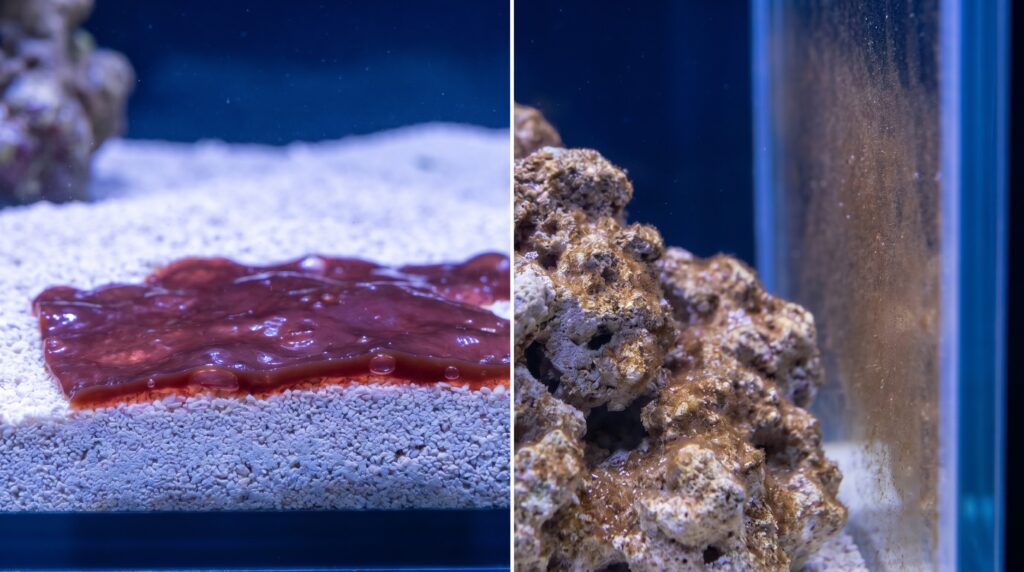
The confusion is understandable. At a glance, several reef pests look similar. The key identifier for cyanobacteria is texture: it forms a flat, cohesive sheet with a slightly rubbery or bubbly surface, and it peels off rock and sand in one piece. It also produces a distinctive musty odor when you siphon it out. Diatoms are powdery brown, not slimy, and wipe off glass easily. Dinoflagellates tend to form stringy, mucus-like strands and often appear more golden-brown or yellow. Our comparison guide on diatoms vs dinoflagellates vs cyano covers the visual identification in more detail, and the broader reef tank algae types guide explains the full range of nuisance organisms you may encounter.
What actually keeps cyanobacteria away long-term
Every reefer who has beaten a persistent cyano outbreak says the same thing: flow and nutrient balance, maintained consistently. The specifics that matter most in practice:
- Keep phosphate and nitrate in the ranges above - not zero, which risks dinoflagellate takeover, and not elevated, which feeds cyano.
- Run your wavemaker(s) in a randomized or gyre mode so no surface in the tank sits in the same flow shadow hour after hour.
- Harvest refugium macroalgae regularly so it continues actively pulling both nitrate and phosphate.
- Replace T5 bulbs on the 9-12 month schedule, swapping 1-2 at a time to avoid coral shock.
- Use 0 TDS RODI water exclusively - silicate and phosphate in tap water are a persistent seed source that defeats every other fix.
Cyanobacteria can colonize a well-run tank during the first few months of cycling - when nutrients are in flux and the biological filter is still establishing - and this is normal. The reef tank algae types article describes the typical sequence. If it persists past the first three months or returns in a mature tank, that is the signal to run through the checklist above rather than wait it out.
Frequently asked questions
Will cyanobacteria harm my corals?
Yes, if left unchecked. Sheets of cyanobacteria can smother coral tissue by blocking light and gas exchange, especially on low-lying LPS corals and soft corals near the sandbed. Isolated patches on rock or sand away from corals are less urgent, but expanding mats should be siphoned off promptly regardless of placement.
Is it safe to use ChemiClean in a reef tank with sensitive corals and invertebrates?
Boyd ChemiClean is marketed as safe for corals and invertebrates at labeled doses. The key risk is oxygen depletion during the 48-hour treatment period as the product oxidizes organic matter. Maintaining a large airstone throughout the treatment is mandatory, not optional. Remove carbon and turn off UV sterilizers for the duration. Monitor closely and perform the 20% water change immediately at 48 hours.
My tests show zero nitrate, but I still have cyano. Why?
Certain cyanobacteria species can fix dissolved nitrogen from the water column, meaning they do not need detectable nitrate to bloom. This situation often develops when carbon dosing or aggressive macroalgae export strips nitrate to zero while phosphate remains above 0.02 ppm. Raising nitrate slightly (ATI's target range starts at 0.025 ppm; aim for the lower end of 0.025-5 ppm) rebalances the ratio and removes the competitive advantage those nitrogen-fixing strains hold. See our guide to phosphate control for the full nutrient-balance approach.
Can snails and crabs eat cyanobacteria?
Some cleanup crew members will disturb or graze on cyanobacteria mats. Cerith snails and trochus snails are the most commonly cited, and some reefers report that a healthy crew of either keeps mat formation in check on an otherwise well-managed sandbed. Nassarius snails are scavengers that burrow through sand eating detritus - they do not graze cyano directly. No commonly available cleanup crew animal treats cyano as a primary food source reliably enough to be considered a stand-alone solution. Clean-up crew helps maintain a tank that already has good flow and balanced nutrients; it does not replace fixing those root causes.