Reef tank setup: the complete beginner guide
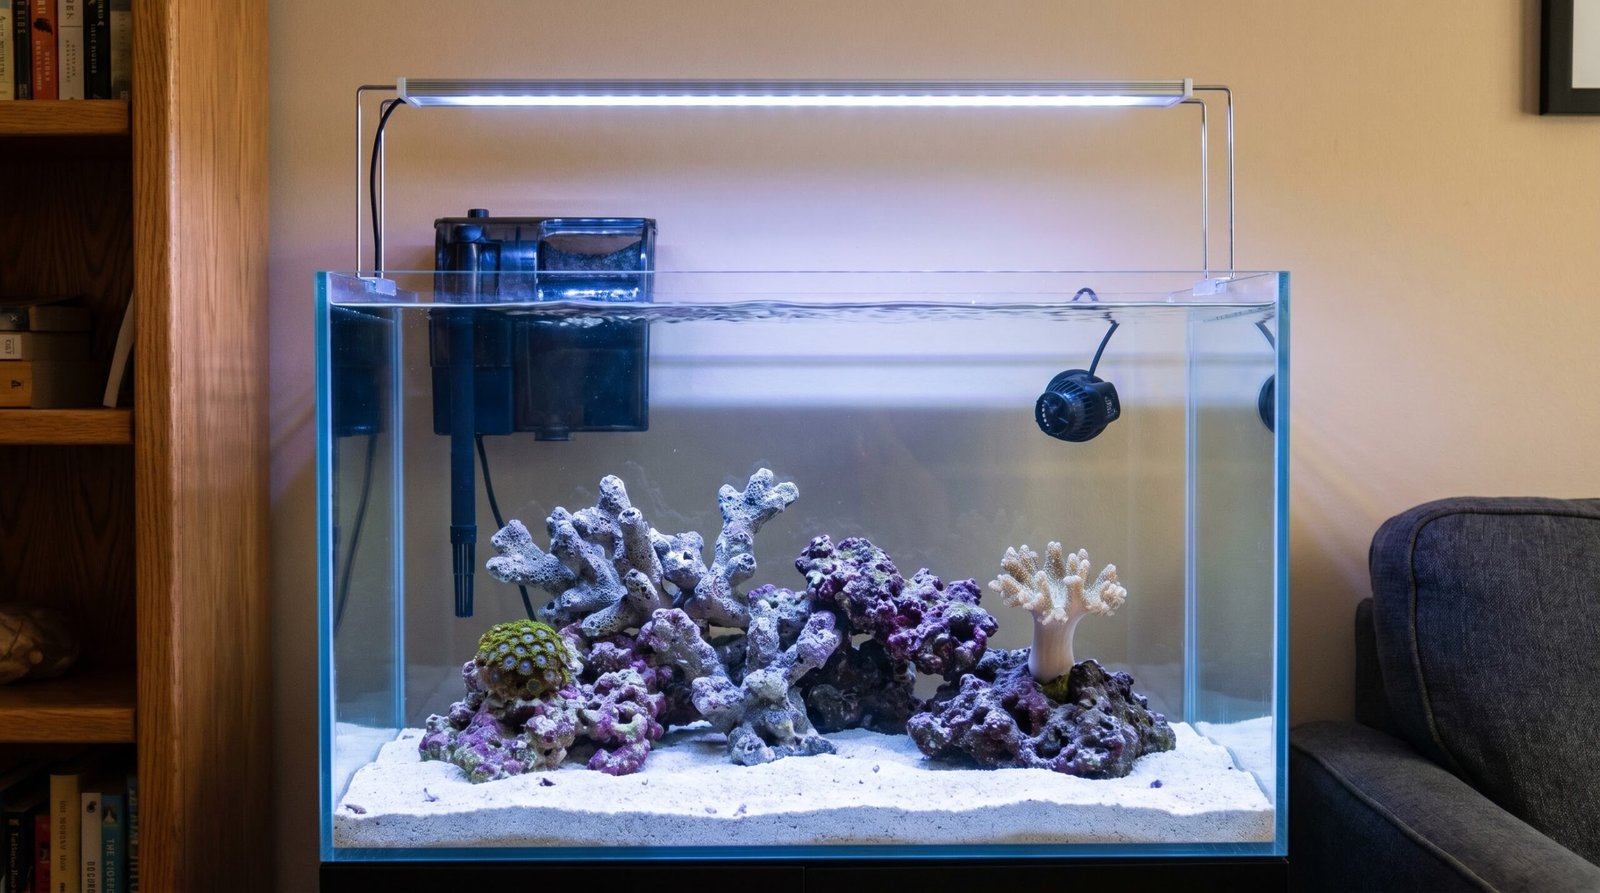
Most people get into reef-keeping after seeing one tank – one impossibly vivid slice of ocean tucked into a living room – and thinking, “I want that.” What usually stops them is the sense that the whole thing is too technical, too expensive, or too easy to kill. None of that is quite true. A well-planned reef can be one of the most forgiving things you own once it settles in. The trick is front-loading the good decisions: picking the right size, buying the right gear, and following the biology rather than rushing it.
This guide walks you through every stage, from choosing your tank to caring for your first corals. Each section links to a deeper page when you are ready for more detail. At the end you will find a stage-by-stage roadmap showing what to do and roughly when – so you always know where you are in the journey.
Step 1: Plan before you buy anything
The planning stage costs nothing and saves you from the two most common beginner mistakes: buying a tank that is too small, and underestimating the total budget.
Tank size
A 40-75 gallon system is the sweet spot for a first reef. Tanks in this range offer meaningful water volume – which means parameters change slowly and forgive small mistakes – without needing a second mortgage for equipment. A detailed look at reef tank sizes will help you match footprint and volume to your space.
The main argument for going bigger than you think you need: every gallon of water acts as a buffer. A sudden temperature swing, an overfeeding incident, or a skipped water change hits a 60-gallon system far less hard than it hits a 10-gallon nano. Nano tanks are absolutely workable, but they demand more attentive maintenance, not less.
Placement
Choose a wall that bears weight well, away from direct sunlight (which drives algae and temperature swings), and near a drain or utility sink. A standard 55-gallon tank filled with water, rock, and sand weighs well over 600 lbs. That is before the stand. Check the floor structure if you have any doubt, especially in older homes or upper floors.
Keep your RODI unit close – you will be filling it regularly. And think about power: a reef tank runs several circuits simultaneously (lights, pumps, heater, skimmer), so a dedicated outlet strip with surge protection is worth planning for from the start.
Budget
A mid-range beginner setup in the 30-50 gallon range typically runs $1,500-$3,000 in startup costs. Ongoing maintenance – salt, RODI filters, test kits, food, and electricity – adds roughly $75-$200 per month depending on tank size. A full breakdown of reef tank costs and a guide to starting on a tighter budget are worth reading before you commit to specific equipment.
One rule that experienced reef-keepers agree on: buy the best light and the best return pump you can afford. Lighting and flow are the two things corals feel most directly, and cheap versions of each create problems that cost more to fix than the savings justified.
Step 2: Assemble your equipment
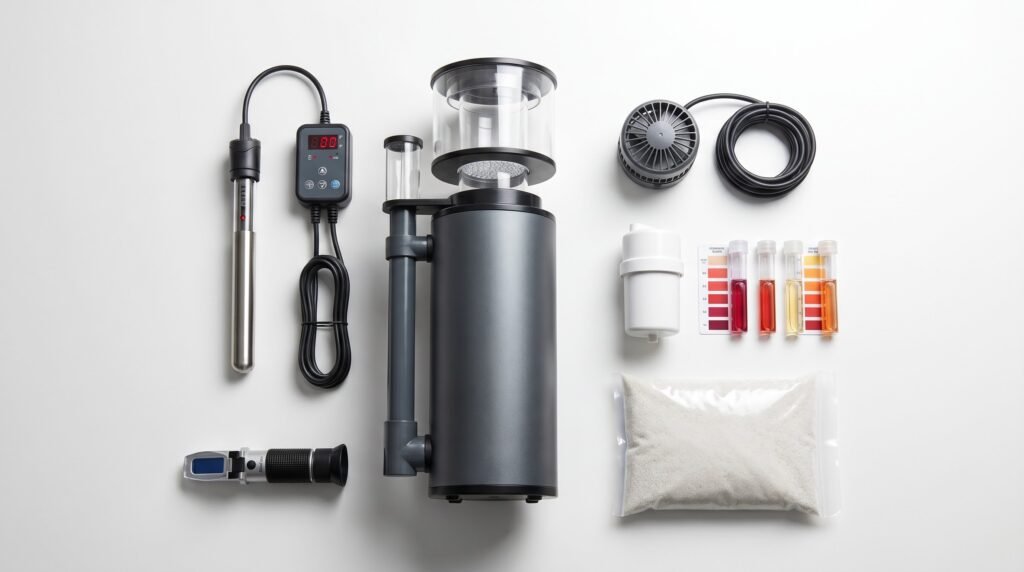
A reef tank is a system, and every component in it has a job. The table below shows what each piece does and whether it is essential from day one or can wait.
| Equipment | What it does | Essential from day one? |
|---|---|---|
| Tank and stand | Houses the system; stand must support the weight | Yes |
| Sump or filtration chamber | Houses protein skimmer, return pump, heater; increases water volume | Recommended; AIO tanks have a built-in version |
| Return pump | Pushes filtered water from sump back into the display | Yes (if using a sump) |
| Wavemaker / circulation pump | Creates flow across rock and corals; prevents dead spots | Yes |
| Protein skimmer | Removes dissolved organics before they break down into ammonia and nitrate | Strongly recommended |
| Heater + controller | Holds temperature at 76-78°F; controller prevents overheating | Yes |
| Reef-capable LED light | Drives photosynthesis in corals and coralline algae | Yes |
| RODI water system | Produces pure water free of phosphate, nitrate, chloramine, and heavy metals | Yes |
| Refractometer | Measures salinity accurately; more reliable than a swing-needle hydrometer | Yes |
| Test kit suite | Tracks ammonia, nitrite, nitrate, pH, alkalinity, calcium, magnesium | Yes |
| Auto top-off (ATO) | Replaces evaporated water automatically; stabilizes salinity | Helpful; can do manually at first |
| Quarantine tank | Holds and observes new fish before they enter the display | Yes, before adding fish |
A full line-by-line reef tank equipment checklist and a detailed equipment guide cover sizing, brand options, and what to skip.
One tool worth calling out: the refractometer. Swing-needle hydrometers – the familiar plastic floats – can drift inaccurate over time due to mineral buildup at the pivot point. Refractometers give a consistently reliable reading from just a drop of water and cost under $30. Calibrate it with a standard solution when you first receive it, then periodically thereafter.
Step 3: Build your aquascape and mix your saltwater
Before anything goes in the tank, you need two things ready: a rock structure that supports biological filtration and coral placement, and saltwater made to the right salinity using RODI water.
Aquascaping
Live rock or well-cured dry rock is the biological engine of a reef. Its porous surface hosts the bacteria that convert ammonia to nitrite to nitrate – the nitrogen cycle your tank depends on. Live rock already carries those bacteria and speeds up cycling considerably. Dry rock starts sterile but becomes colonized over time and gives you more freedom to shape the aquascape as you like. A comparison of live rock vs dry rock covers the trade-offs in full.
Aim for open, branching structures with good flow around every surface. Flat ledges and caves give corals variety in light and flow. Leave room between rock and glass on all sides so you can clean and observe easily. Secure heavy pieces with reef-safe epoxy or aquarium putty – a toppled structure onto a coral is a bad day.
Saltwater and salinity
Always mix saltwater from RODI water. Tap water carries phosphate, nitrate, chloramine, and heavy metals that stress or kill reef inhabitants. Phosphate in particular inhibits the way corals take up calcium carbonate – the building block of their skeletons. An RODI system strips all of that out, giving you a clean base that you control entirely. Our guide to how to mix saltwater walks through the process step by step.
Target salinity is around 1.025 specific gravity (approximately 35 ppt), with the acceptable range being 1.023-1.026. Measure it with a refractometer, not a swing-needle hydrometer. Once dialed in, keep it stable: evaporation raises salinity daily, so top off with fresh RODI water (never saltwater) to compensate. Most reefers set up an auto top-off unit once they see how quickly a small tank can drift.
Step 4: Cycle the tank

Cycling is the process of growing the bacteria colonies that process fish waste. Without it, ammonia from any living thing in the tank reaches toxic levels within days. It is not optional, and it cannot be rushed significantly – but it is completely straightforward once you understand what is happening.
What the nitrogen cycle looks like
Stage one: an ammonia source (a raw shrimp, pure ammonia, or bottled bacteria) begins feeding Nitrosomonas bacteria, which colonize porous surfaces throughout the tank. Those bacteria convert ammonia to nitrite.
Stage two: a second group of bacteria – Nitrobacter and Nitrospira species – colonize the same surfaces and convert nitrite to nitrate. Nitrate is far less toxic than the two compounds before it.
Stage three: ammonia and nitrite both read zero on your test kit. Nitrate climbs, often past 10 ppm. That is your signal: the cycle is complete.
The whole process typically takes four to eight weeks. Adding bottled bacteria products and seeding with a few cups of sand or a piece of rock from an established tank can shorten it meaningfully. A full walkthrough is in our reef tank cycling guide.
How to know the cycle is done
Test every two to three days once you add an ammonia source. You are looking for ammonia to spike, then fall to zero; nitrite to spike after it, then fall to zero; nitrate to rise and hold. When ammonia and nitrite both read zero on back-to-back tests a day apart, the tank has cycled. Do a large water change (30-50%) before adding livestock, to bring nitrate down from the spike.
Step 5: Survive the ugly stage
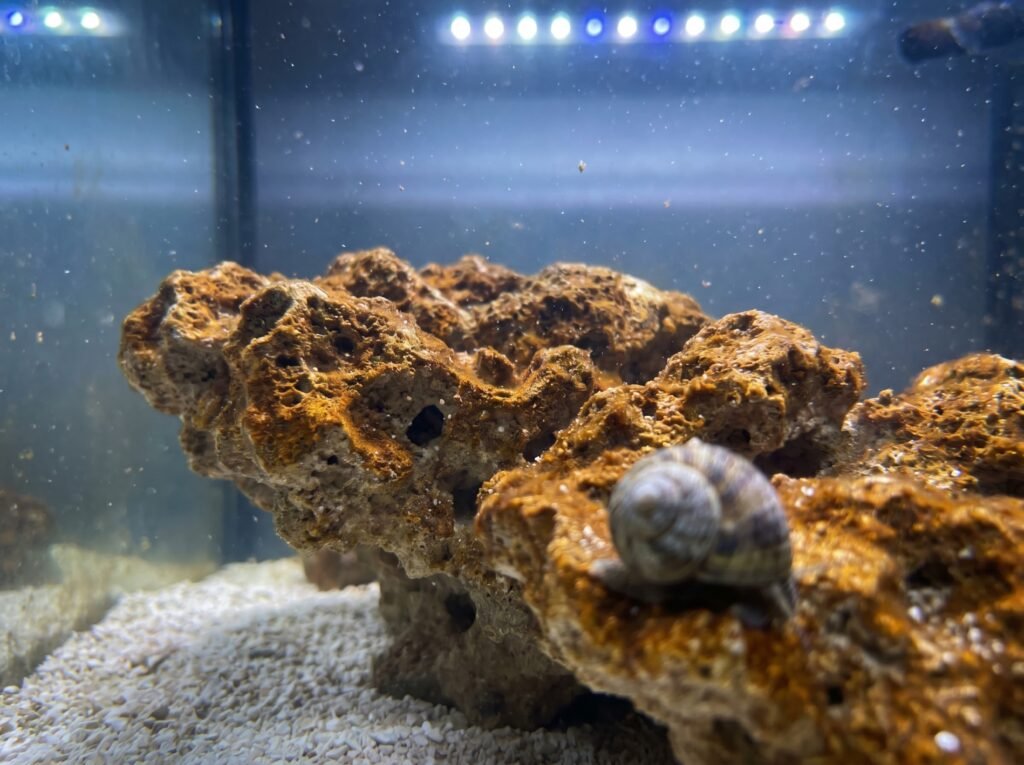
Within the first few weeks after cycling – sometimes before it finishes – the tank will look terrible. Brown film coats the rock and sand. Green patches appear on the glass. This is the ugly stage, and it happens to virtually every new reef.
The brown film is diatoms: single-celled algae that thrive on the silicates leaching from new dry rock and sand. In an established tank, coralline algae, diverse bacteria, and microfauna keep diatoms in check. In a new system, those competitors are not present yet. The diatoms fill the gap temporarily. Expect them to last two to six weeks as the system matures, then fade on their own as silicate runs out and the microbial community fills in.
After diatoms, many tanks go through a green algae phase, and some encounter cyanobacteria (a red or blue-black slime) or a brief bloom of dinoflagellates. Each of these signals a different imbalance in the maturing system. Our guide to the reef tank ugly stage explains what each one looks like and when to act. The core advice: do not panic, do not overdose chemicals, keep up with water changes, and trust the biology.
Step 6: Add your first livestock – in the right order
The sequence matters. Add things in the wrong order and you set yourself up for disease outbreaks, parameter crashes, and dead animals. The right order is: cleanup crew, then fish, then corals.
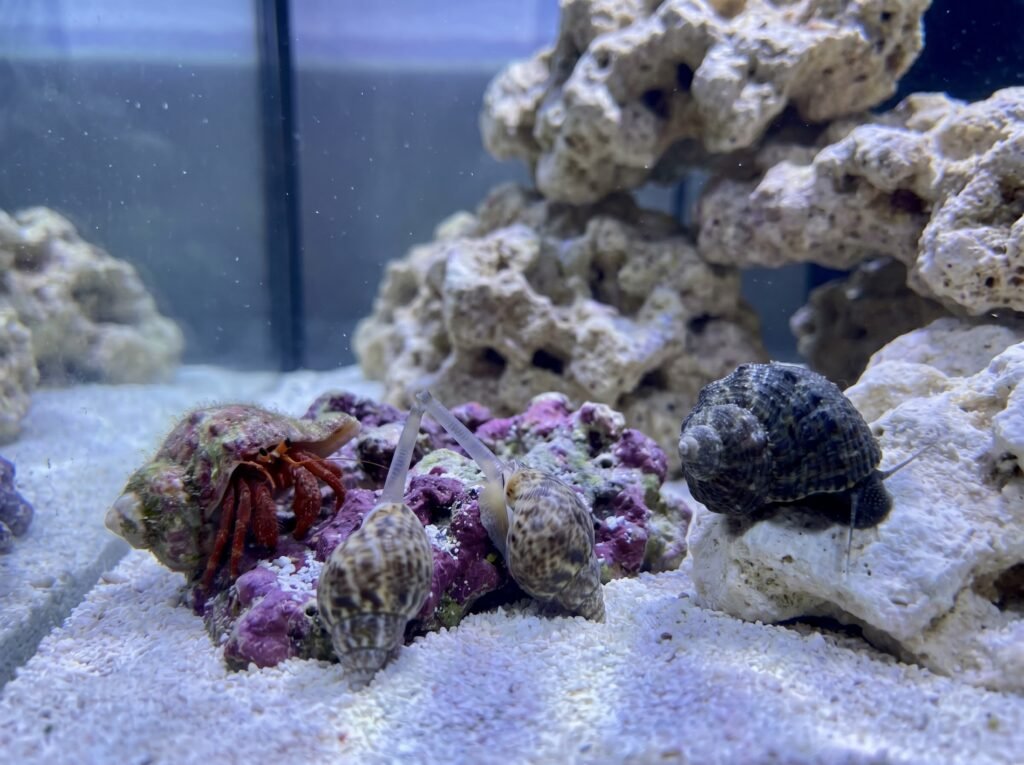
Cleanup crew first
A cleanup crew (CUC) – typically a mix of snails, hermit crabs, and possibly a cleaner shrimp – does the work of consuming diatoms, detritus, and uneaten food before it breaks down into ammonia and phosphate. Nassarius snails burrow through the sandbed processing buried fish waste; astrea and turbo snails graze algae from glass and rock; hermit crabs work the crevices that snails cannot reach. Each fills a different niche in the tank’s housekeeping.
Inverts are sensitive to salinity swings. Drip-acclimate everything – invertebrates especially – by placing them in a bucket and running a slow siphon from the display tank at about two to four drips per second for 45-60 minutes. The gradual water mixing prevents osmotic shock that can kill snails and shrimp even when the destination tank has perfect parameters. More detail on the best options is in our cleanup crew guide.
Fish next
Add fish one or two at a time, not all at once. Every fish you add raises the bioload, and your bacteria colony needs time to scale up to match it. A sudden large addition can spike ammonia to toxic levels even in a fully cycled tank.
Before any fish enters the display tank, it goes into a quarantine tank first. A basic quarantine setup – even a 10-20 gallon bare tank with a heater, a small filter, and a hiding spot – lets you watch new arrivals for two to three weeks. Quarantine catches ich, velvet, and bacterial infections before they reach the display, where copper-based treatments (the standard cure) can never be used. Copper is lethal to invertebrates and corals at any meaningful concentration. One infected fish that skips quarantine can devastate a reef.
For beginner-friendly fish options, our guide to best beginner reef-safe fish covers species that tolerate the normal parameter swings of a new system and coexist with corals.
Corals last
Most corals need a tank that has been running for at least three months – ideally longer – before they stand a real chance. By that point, the ugly stage has passed, parameters have stabilized, and you know your system well enough to place coral in appropriate flow and light zones.
Start with soft corals: mushrooms, leathers, zoanthids, and pulsing Xenia. They tolerate the widest range of light and alkalinity, and they tell you clearly when something is wrong (they close and stay closed) without dying instantly. LPS corals come next. SPS corals – the branching Acropora and Montipora that many advanced reefers chase – belong in a mature, ultra-stable system with dialed parameters. Our guide to best beginner corals gives you a clear starting list.
Your reef tank setup roadmap
The table below maps every stage to a rough timeframe. Nothing here is a fixed deadline – biology does not run on a clock – but the sequence is firm. Complete each stage before moving to the next.
| Stage | What you are doing | Typical timeframe | Deep dive |
|---|---|---|---|
| 1. Plan | Choose tank size, placement, and budget | Before purchase | Tank sizes guide |
| 2. Buy equipment | Assemble tank, sump, light, pumps, heater, RODI, test kits | Before setup | Equipment checklist |
| 3. Build and fill | Aquascape rock, add sand, mix saltwater to ~1.025 SG (range 1.023-1.026) | Day 1 | Setup walkthrough |
| 4. Cycle | Establish nitrogen cycle; ammonia + nitrite reach zero | Weeks 2-8 (often 4-6) | Cycling guide |
| 5. Ugly stage | Survive diatoms, green algae, possible cyano – keep doing water changes | Weeks 3-10 | Ugly stage guide |
| 6. Add cleanup crew | Snails, hermits, cleaner shrimp; drip-acclimate all inverts | After cycling is confirmed | Cleanup crew guide |
| 7. Add fish | 1-2 at a time; quarantine each for 2-3 weeks first | Month 2-3 | Beginner fish guide |
| 8. Add soft corals | Mushrooms, zoanthids, leathers once parameters are stable | Month 3+ | Soft corals guide |
| 9. First 90-day routine | Weekly water changes, regular testing, consistent maintenance | Ongoing from day 1 | Water parameters guide |
The first 90 days: what to test and when
The most important thing about the first 90 days is consistency. You are not chasing perfect numbers – you are detecting trends and staying ahead of problems.
What to test and how often
During cycling (weeks 1-8): test ammonia and nitrite every two to three days. Log the numbers. You are watching for the spike-and-drop pattern that signals a healthy cycle progressing. Check salinity and temperature daily – they can shift quickly during the adjustment period, especially before an auto top-off is installed.
After cycling (weeks 8-12): once livestock is in, shift to a weekly test of the full suite – pH, alkalinity, calcium, magnesium, nitrate, phosphate. Weekly water changes of 10-15% (small systems) to 20% (larger systems) handle most routine parameter management without dosing. Write everything down. A logbook showing three months of consistent parameters is enormously useful when something eventually goes wrong – and in a maturing system, something always does.
Months 3 and beyond: once the tank has stabilized and you understand its rate of parameter change, you can reduce testing frequency. Many reefers check the big three (alkalinity, calcium, magnesium) twice a week once corals are present, because those parameters get consumed as corals grow. Our water parameters guide covers the full target ranges and what to do when numbers drift.
The key numbers, in brief
- Salinity: ~1.025 SG (35 ppt), acceptable range 1.023-1.026. Stable is more important than hitting an exact number.
- Temperature: 76-78°F. Swings cause more stress than a reading that is 1°F off the ideal.
- pH: 7.8-8.4. A daily swing is normal; the average matters more than the peak.
- Alkalinity: 8-11 dKH. The single most important parameter to keep stable once corals are in.
- Calcium: 400-450 ppm. Balanced with alkalinity – the two move together. Some sources list 350 ppm as acceptable, but most reef corals do better toward the higher end of that range.
- Magnesium: 1250-1350 ppm. Stabilizes the calcium/alkalinity relationship.
- Nitrate: 1-10 ppm for a reef. Zero is not better – corals and coralline algae need some nitrogen.
- Phosphate: 0.03-0.10 ppm. Again, not zero. Nutrient-starved tanks often develop dinoflagellates.
Two numbers that many beginners try too hard to eliminate: nitrate and phosphate. Both are essential in trace amounts. Coral bleaching and dinoflagellate outbreaks are often triggered by nutrient levels that are too low, not too high. The goal is a stable, low-nutrient environment – not a sterile one.
Four things that sink beginner reef tanks
These are the errors that experienced reefers see over and over. They are all avoidable.
Moving too fast. Skipping the cycle, adding fish before the ugly stage passes, piling corals in during month one. Biology cannot be accelerated beyond its natural pace. The roadmap above exists for this reason.
Using tap water. Tap water contains phosphate, silicate, chloramine, and often copper – all of which harm reef inhabitants. Always use RODI water for mixing and top-offs.
Using copper medications in the display tank. Copper kills ich and velvet in fish, but it is lethal to every invertebrate and coral in the tank. It also absorbs into rock and substrate and leaches back out when pH drops – meaning a tank that was treated with copper may never safely house inverts again. Copper treatments belong only in a bare quarantine tank, never in the display.
Skipping quarantine. One fish carrying ich that goes directly into a display reef can spread the parasite to every fish in the tank. Without a quarantine tank, treating an outbreak in a reef is nearly impossible – copper cannot go in, and reef-safe alternatives are far less reliable. The 20 minutes it takes to set up a simple quarantine tank is the best insurance you can buy.
Frequently asked questions
How long does it take to set up a reef tank?
The physical setup – tank, rock, water, equipment – takes one to two days. The cycling stage takes four to eight weeks. Most beginners are adding their first fish around the two-month mark and corals around month three. Budget at least three months from purchase to a properly stocked reef.
Do I need a sump for a reef tank?
A sump adds water volume, houses equipment out of sight, and makes the system more stable. It is not strictly required – all-in-one tanks include a built-in filtration chamber – but a separate sump is worth adding once you have more experience. Start with what fits your budget and space.
Can I use live rock from another tank to speed up cycling?
Yes. A few pounds of rock from an established, healthy reef seeds your tank with established bacterial colonies and can cut weeks off the cycling timeline. Make sure the source tank is disease-free, and inspect any live rock carefully for pest hitchhikers like aiptasia anemones or mantis shrimp before adding it to your display.
Why do I need a quarantine tank if my fish look healthy?
Many fish carry ich and other parasites without showing symptoms under the lower stress of a fish store. The stress of shipping and transfer triggers outbreaks. A two-to-three week quarantine period lets you confirm the fish is genuinely healthy and eating well before it enters a reef where treatment options are severely limited by the presence of corals and invertebrates.
What is the cheapest way to start a reef tank?
An all-in-one nano tank (20-30 gallons) with soft corals only can come in well under $1,000 in startup costs if you buy used equipment. The real savings come from patience: starting with a small system, getting good at maintenance, and upgrading later – rather than buying everything at once and making expensive mistakes on a large tank.
Read next
The SteadyReef team
We write calm, plain-English reef-keeping guides. Every claim is checked against the marine-science and manufacturer sources listed above before publishing.