Reef tank aquascape: build rockwork that looks good and actually works
Before a single coral goes in, the shape of your rockwork decides almost everything else: where detritus collects, which corals get light, how well your powerheads actually move water, and whether the whole structure comes down at 2 a.m. when a snail climbs the wrong ledge. A reef tank aquascape is not just decoration. It is the physical infrastructure of the system.
The principles below are drawn from how natural reef structures work – specifically the relationship between three-dimensional complexity, water movement, and organism distribution that reef scientists have documented – and translated into practical guidance for a home tank. If you want the short version: build stable, build open, build at multiple heights, and leave more empty space than feels comfortable.
The six principles that drive every good aquascape
These are not stylistic preferences. Each one addresses a failure mode you will actually encounter.
1. Stability comes first – always
A collapsed rock pile can crush corals, pin fish, crack glass, and crack your sump line at 11 p.m. Build your base so that it cannot tip, slide, or topple if a large fish rams it, a sand-shifting goby undermines it, or an emerald crab decides to remodel. Set base rocks directly on the bare tank bottom before you add sand – never on sand, which shifts. Then glue or cement anything that touches the glass or spans a gap.
The practical test: once you think the structure is done, push it firmly from each side. If anything moves, fix it before adding water.
2. Open flow means no detritus dead zones
Research into how water movement affects corals at the microscopic level shows just how much flow matters. A study published in PMC found that “water flow is a key environmental factor due to its influence on the coral concentration boundary layer” and that “under reduced water flow, the O2 CBL becomes thicker and O2 flux is decreased.” In plain terms: low flow starves corals of oxygen and traps waste products against their tissue.
The same physics plays out in your display tank. Any enclosed pocket in your rockwork – a tight cave sealed on three sides, a rock resting flush against the back glass, a pillar of stone with no gaps at the base – becomes a low-flow zone where detritus settles, bacteria consume oxygen, and nitrates climb. The fix is architectural: leave passages through and under the rock, not just around it. Position structures so your powerheads can push water into every corner. If you cannot point a flashlight through a gap, water probably is not moving through it either.
3. Coral real estate at multiple heights
Different coral groups need different light and flow intensities. SPS frags thrive high up in strong, direct flow. Hammers and torches sit mid-column where light is moderate and flow is gentler. Mushrooms and some leathers prefer low-light areas near the base. A flat slab of rock that sits at one height forces you into compromises for all of them.
Build ledges, shelves, and peaks at three distinct levels: a lower zone from roughly the sand bed to one-third up the water column, a mid zone, and an upper zone near the surface. This mirrors how natural reefs distribute colonies across a vertical gradient – colony geometry and placement position are so important that reef science describes them as “essential” to determining the “light niche of zooxanthellate corals.” Read more about how to match each coral type to the right spot in our guide to coral placement, light, and flow.
4. Negative space is part of the design
The open sand in front of the rocks is not wasted space. It gives fish room to swim, gives flow a path to travel, gives you a maintenance lane, and makes the whole scape look three-dimensional rather than like a pile of rubble against the back wall.
A useful target: rock should occupy no more than about one-third of the tank’s footprint. The rest stays open. Visually, negative space creates contrast – the eye needs empty foreground to read the structure behind it. Functionally, open sand areas have far fewer detritus traps than a tank filled wall-to-wall with stone.
5. Front-to-back depth creates dimension
The biggest single mistake beginners make is building straight across the back wall. It looks flat from the front, cuts flow, and gives fish nowhere to hide. Instead, angle the main structure diagonally, or build the tallest peak off-center and let smaller satellite rocks step forward toward the front glass. This creates a sense of depth that makes a 50-gallon tank look far bigger than it is.
Leave a minimum 2-inch gap between any rockwork and the back glass. This gap lets water circulate behind the structure, prevents algae from plastering itself to an unreachable surface, and gives you a place to run return lines or probe cables.
6. Less rock than you think
The old 1-2 lb of live rock per gallon rule came from using dense Fiji rock as the primary biological filter. Modern reef keeping relies more on efficient skimming, good flow, and deep sand beds for filtration – the rock is structural and biological, but not the only filter. CaribSea, whose Dreamscapes kits are sized at roughly one box per 40-60 gallons (about 40 lbs of rock for that range), makes the current thinking concrete: porous, lightweight rock with high internal surface area does more biological work per pound than the old dense stuff.
A practical range for most builds: 1 to 1.5 lbs of porous aragonite or limestone per gallon of display volume. Go lower if you run a large, efficient sump. Go toward the high end only if your rock is dense and you have minimal other filtration. More rock than this usually just means more dead zones and less swimming space.
For a deeper look at the rock itself – what is alive in it, when to use dry versus live, and how curing works – see our comparison of live rock vs. dry rock.
Four aquascape styles (and what each one demands)
The principles above apply to every style. What changes is the geometry and the specific management tradeoffs.
| Style | Shape | Best for | Watch out for |
|---|---|---|---|
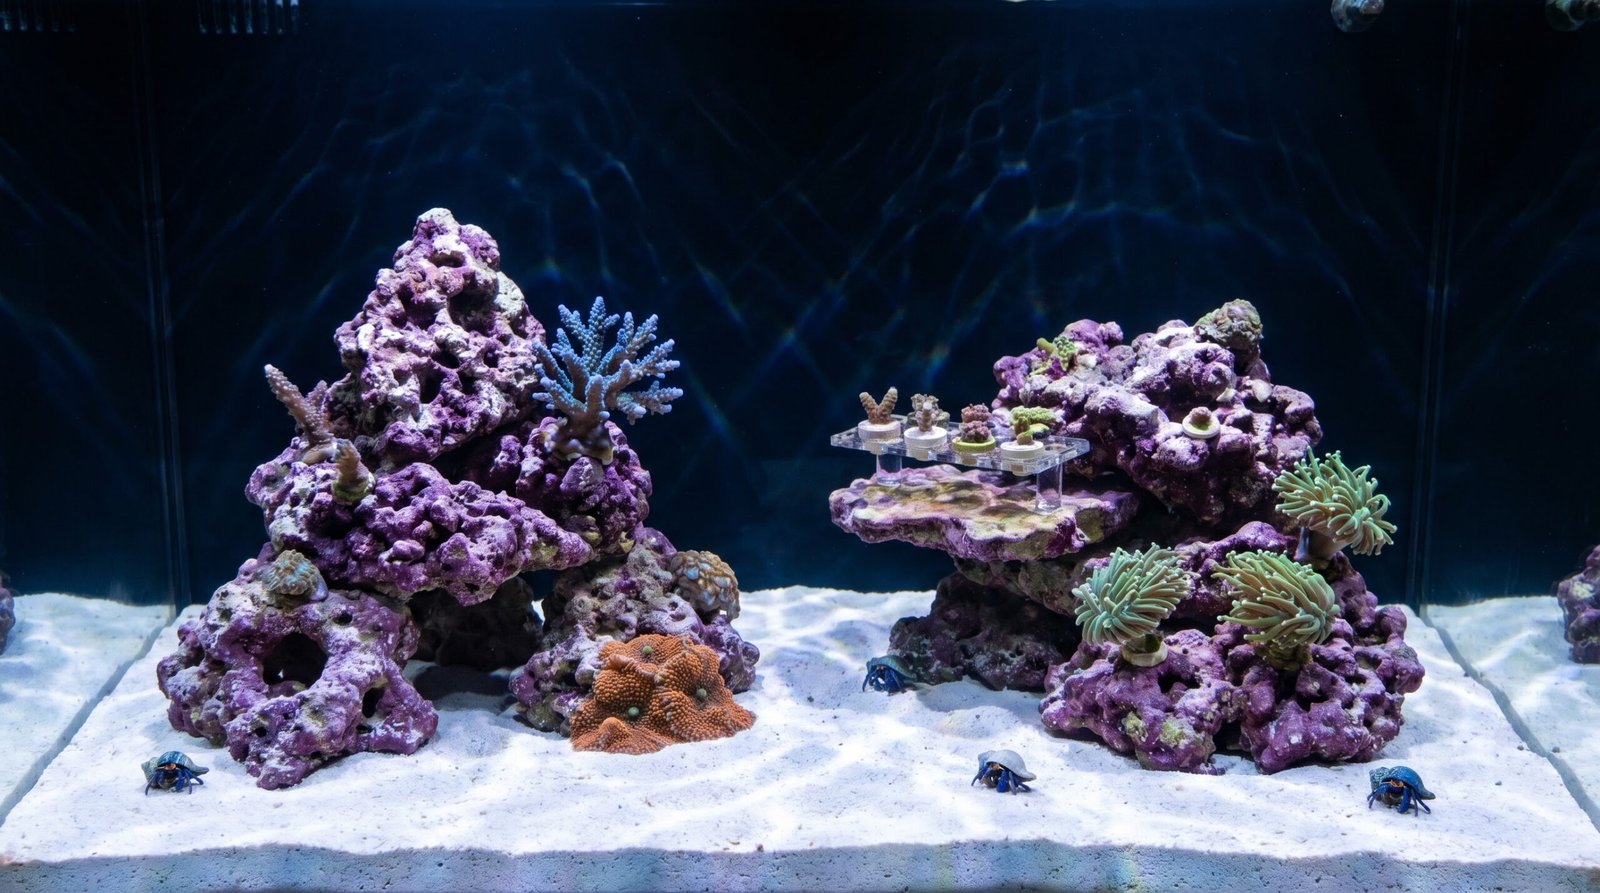
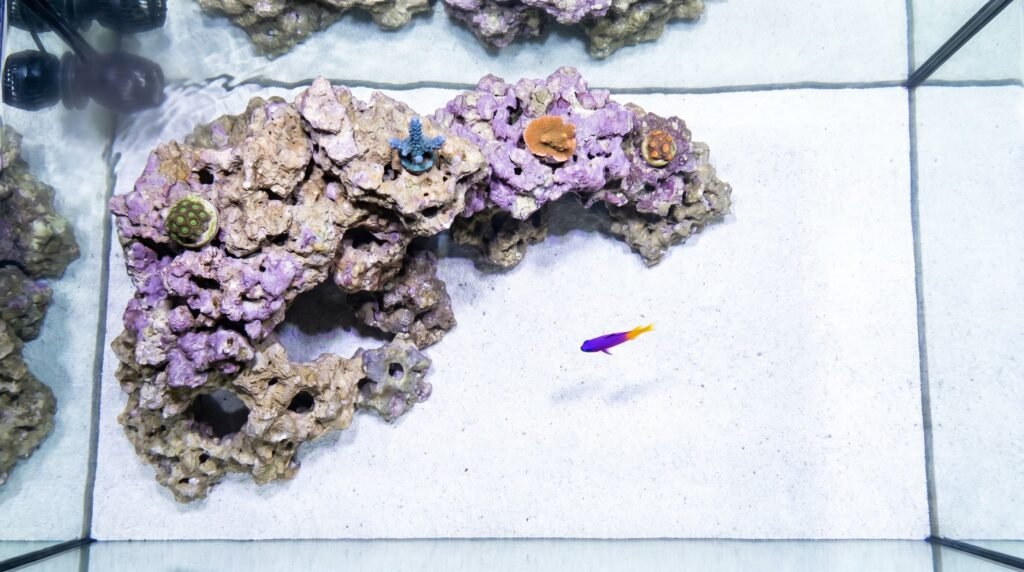
| Island | Two or more discrete rock masses separated by open sand | Mixed coral tanks; gives each colony group its own zone; excellent flow between islands | Each island must be independently stable; SPS can eventually bridge the gap and complicate maintenance |
| Peninsula / slope | A single structure that runs from one end of the tank toward the center, viewable from two long sides | Peninsula-style tanks; dramatic depth; clean maintenance lane on both sides | The free end hangs unsupported – anchor with a rod through the base or it will migrate over time |
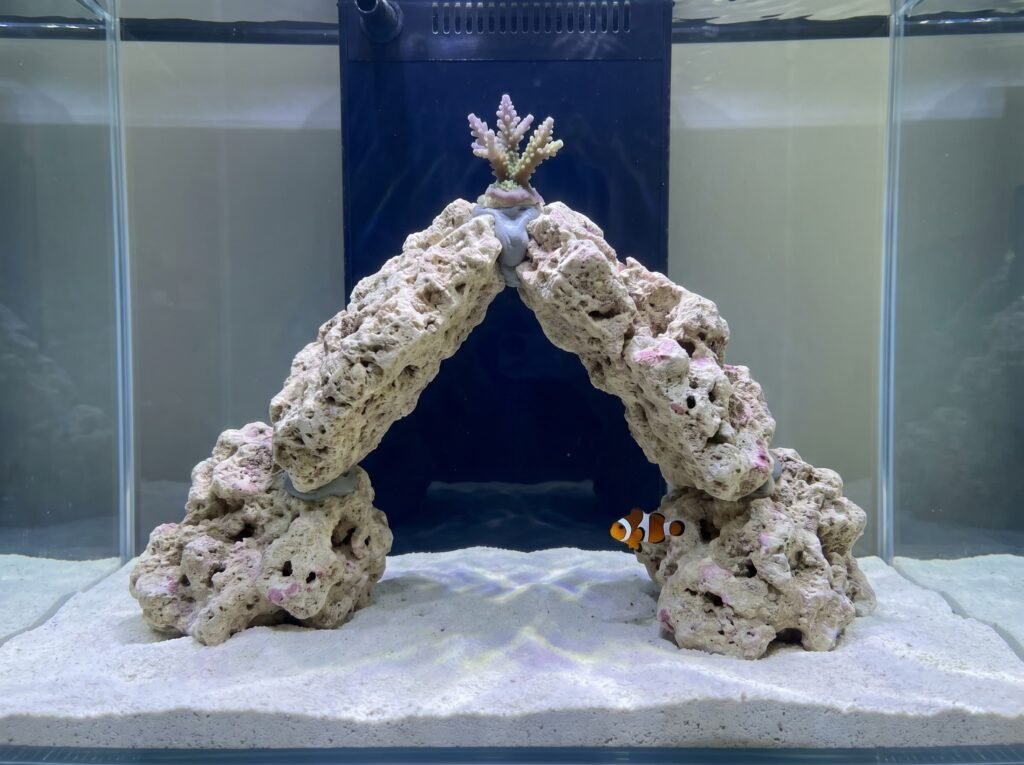
| Arch / bridge | A central formation with a visible opening or tunnel beneath it | Strong focal point; excellent flow-through under the arch; popular for nano tanks | The span must be glued solid – an unglued arch that relies on friction alone will fail; not suited to heavy SPS loading on top |
| Minimalist | One or two spare rock pieces with maximum open water | Softies and easy LPS; fish-forward systems; tanks where flow and visibility matter most | Fewer coral placement options; the rock you do use must be visually interesting because it carries the whole design |
Securing the structure: glue, epoxy, and rods
There are three tools, and each has a different job.
Cyanoacrylate gel (super glue)
This is your everyday bonding agent. Seachem’s Reef Glue, for example, is “a superior cyanoacrylate gel for gluing and mounting coral frags and colonies to reef rock or plugs” that “bonds within seconds and has excellent control, hold and durability characteristics” and “can even be used underwater.” Gel formula is important – liquid CA runs everywhere and makes a weak underwater bond. Use gel for attaching small rocks to each other, for initial position-setting, and for mounting frags once the structure is built.
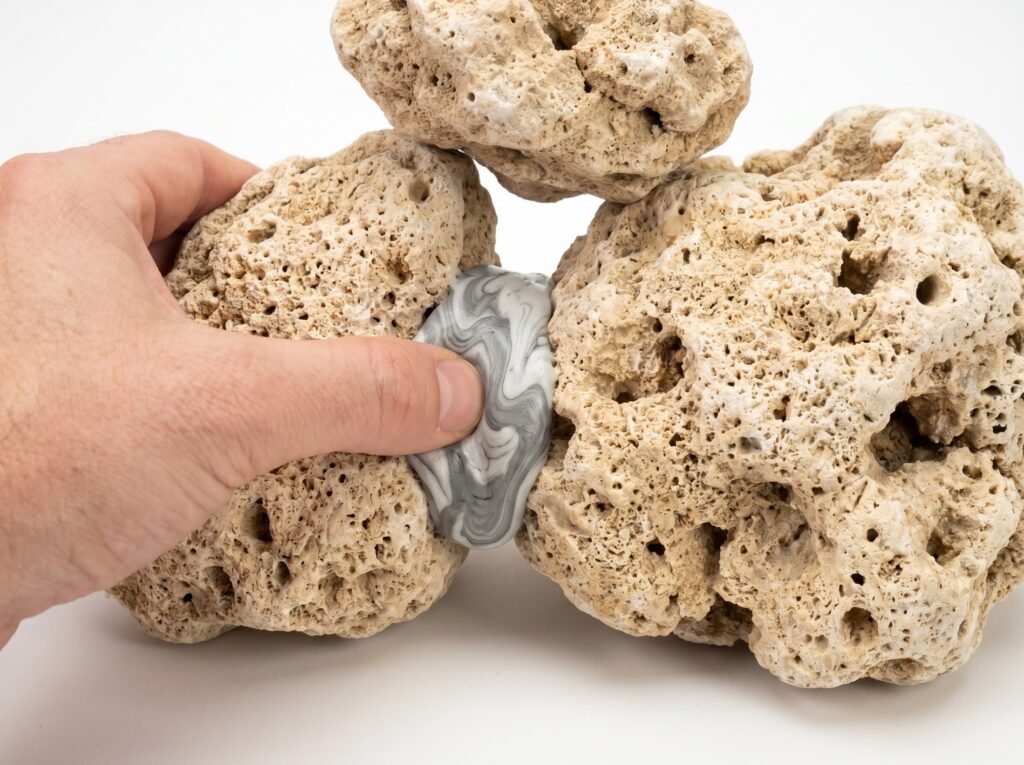
Two-part epoxy putty
When you need a structural bond – spanning a gap, locking a critical base rock, bridging two pieces that will carry weight – epoxy putty is the right choice. Two Little Fishies AquaStik is a widely used example: “non-toxic, color-matched to seamlessly blend with coralline algae and live rock” with a working time that requires mixing for 5-10 minutes. Press it into joints like putty, shape it to fill gaps, and it cures hard. Use it on any connection where CA alone feels thin. It handles fine in water as long as you press it into contact firmly.
Fiberglass or acrylic rods
For tall, dramatic structures – overhanging ledges, arches, peninsula tips – rods are the engineering solution. The method: drill holes through each piece of rock at the same diameter as the rod, thread sections of rod through the stack, then fill joints with epoxy putty or hydraulic cement. Fiberglass rods handle bending stress better than acrylic before they fail, making them a good choice for spanning pieces. Clear acrylic is less visible where the rod might be seen. Soak any cement-bonded structure in fresh RO/DI water for several days before placing it in the display – cement leaches alkalinity and can spike parameters in a small tank.
For all securing methods, do the work outside the tank, let everything cure completely, then do a final stability push-test before adding sand and water.
A pre-build checklist
Run through this before you add a drop of water.
- Base rocks sit on bare glass, not on sand.
- No single rock balances on a point contact – at least two points of contact or glued to a base rock.
- Every enclosed pocket has an entry and an exit for water flow.
- At least 2 inches of clearance between rock and back glass.
- Three distinct height levels visible from the front.
- Main structure occupies no more than one-third of the tank footprint.
- All glued or epoxied joints are fully cured and tested by firm pushing.
- Any cement-bonded pieces have been soaked in RO/DI water for at least 48-72 hours, ideally several days.
- Structure leaves clear swimming lanes for fish to navigate front to back.
- At least one planned coral placement at each height level before corals arrive.
What about sand and the substrate layer?
The aquascape does not end at the rocks. A shallow sand bed of around 1 inch provides visual contrast, a home for sand-sifting fauna, and helps soften the base of the structure aesthetically. If you want a sand bed thick enough to support anaerobic denitrification, go to 4 inches or deeper – the in-between depth of 2-3 inches is often called a “dead zone” by experienced reefers because it traps detritus without the biology to process it. Bare-bottom setups work too – some reefers prefer them because detritus stays visible and easy to remove with a pump. The choice affects how you finish the base of your rockwork: on a sand bed, you can hide the base rocks somewhat; on bare glass, every rock edge is visible and needs to look intentional.
See our breakdown of live sand vs. dry sand vs. bare bottom and our guide to the best sand for a reef tank to match the substrate to your system.
Aquascaping a nano tank
Everything above applies in miniature, but the margins are tighter. A 20-gallon tank has almost no room for error: one poorly placed rock and you have blocked 40% of your flow path. In nano builds, fewer but more visually interesting pieces beat a pile of rubble. A single dramatic arch or a two-island layout with generous sand between them usually works better than any attempt to scale down a large-tank design. For nano-specific approaches and layout ideas, see our dedicated guide to nano reef aquascaping ideas.
Frequently asked questions
How much rock do I actually need?
For a display with good skimming and flow, 1 to 1.5 lbs of porous rock per gallon of display volume is a reasonable starting range. CaribSea’s sizing guide for their Dreamscapes kits works out to roughly 1 lb per gallon. Dense rock from older suppliers often required more per gallon because surface area per pound was lower; modern lightweight, porous aragonite does more filtration work at lower weight.
Can I aquascape after the tank is running?
Yes, but plan it carefully. Moving rock in an established system releases trapped detritus and can spike ammonia briefly in a young tank. Work in sections if possible, have flow and skimmer running at full capacity, and do a water change the same day. In a mature, well-cycled tank, a minor rescape rarely causes a full cycle crash, but monitor ammonia for 48 hours afterward.
Do I need to glue everything?
Not everything – but anything that could shift and damage corals or crack glass should be glued. A loose rock at the base of a tall stack is the one that needs epoxy putty. Smaller top rocks that carry no load can rest freely. When in doubt, glue it. The goal is a structure that is physically stable independent of friction.
Is super glue safe in a reef tank?
Plain cyanoacrylate gel (the active ingredient in products like Seachem Reef Glue) is reef-safe once cured. The white “smoke” that sometimes appears when CA hits saltwater is a fine mist of rapidly cured polymer – harmless and temporary. Avoid products with added accelerants or colored dyes. Use gel, not liquid, for underwater application.
The SteadyReef team
We write calm, plain-English reef-keeping guides. Every claim is checked against the marine-science and manufacturer sources listed above before publishing.